Overview
The Request System provides a central location for tracking and managing the wide range of requests for resources that can be presented to an open access facility. Registered users can submit requests that can be routed to the appropriate staff members and tracked as work progresses. Requests can be very simple, consisting of a single sentence – ex. “Please fill LN2 tank” or complex, multi-step process descriptions containing equipment bookings, file uploads, and a history of comments.
Request Types
Request Types are arbitrary and can be used to represent a number of different objects. Some examples are:
- Administration
- Maintenance
- Service
- Sample
- Process Step
- Training
- Consultation
- Safety
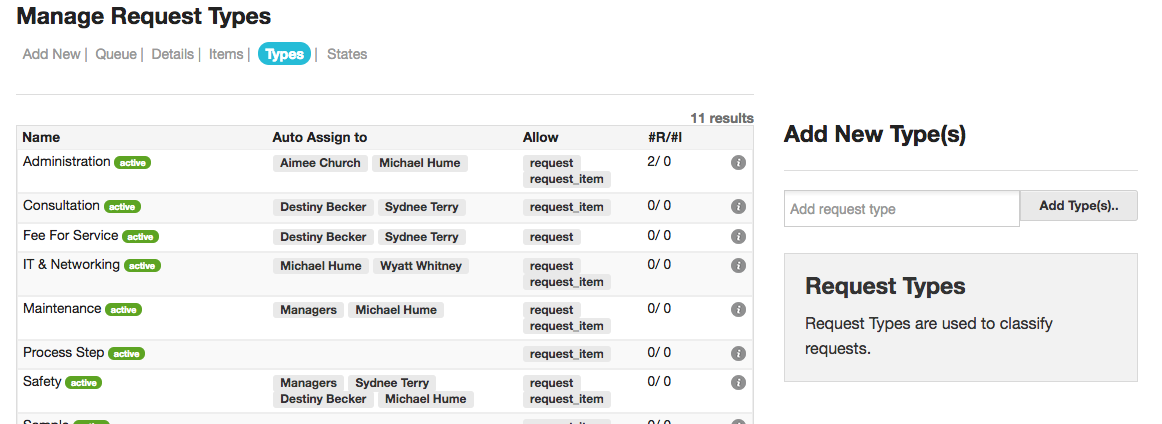
To manage the available types, go to the Admin Requests section. Select Types.
To create a new type, simply enter a name, or multiple names, and click Add. The new types will be added to the list. To edit a type, click the info icon to the right of the name.
Much of the power of the system comes from the ability to automatically assign requests based on the type. When users are assigned a request, it will show up in their task-list on the homepage when logging into LMACS.
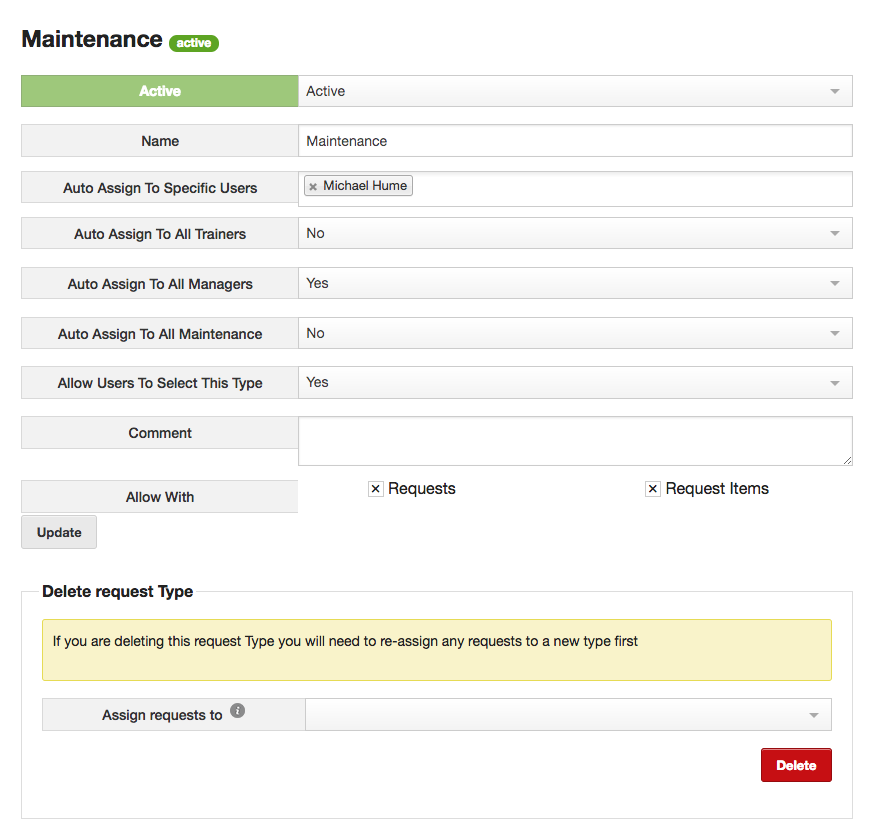
Status – Inactive types cannot be selected
Name – The common name for the request type
Auto Assign To Specific Users – Enter a list of users who should be automatically assigned when this type of request is submitted.
Auto Assign to all Trainers – When a request includes specific tools, those users listed as trainers on the tools will be assigned to the request
Auto Assign to all Managers – When a request includes specific tools, those users listed as managers on the tools will be assigned to the request
Auto Assign to all Maintenance – When a request includes specific tools, those users listed as maintenance on the tools will be assigned to the request
Allow Users to Select this type – If no, only staff members will be able to select this type
Comment – Standard comment block
Allow With – Determines if this type can be used for requests (top level) or items, or both.
Delete – If deleting a type that currently has requests associated with it, you must first select a new type to assign those requests to.
Request States
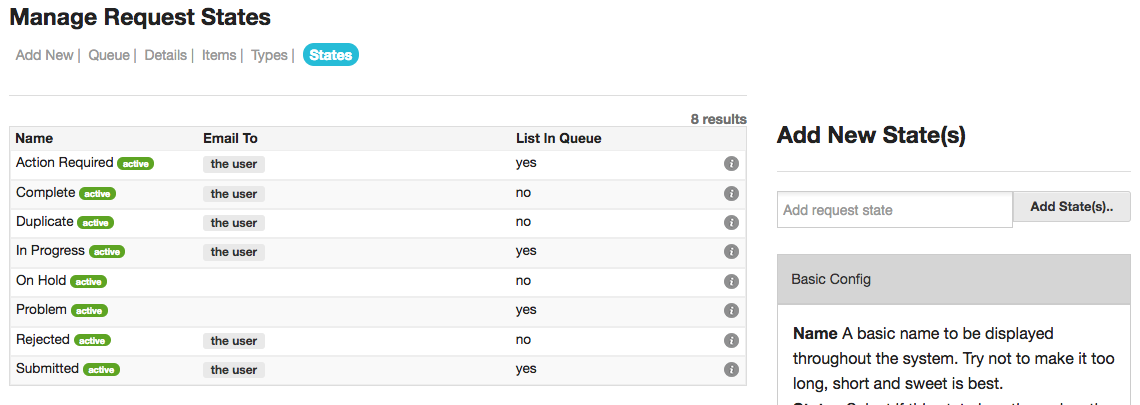
As a request is worked on, it will likely go through a number of states. States provide feedback to the users about where things stand, and also allow the system to take some action based on the state.
Adding new states follows the same pattern as types. To edit a state, click the info icon on the right.
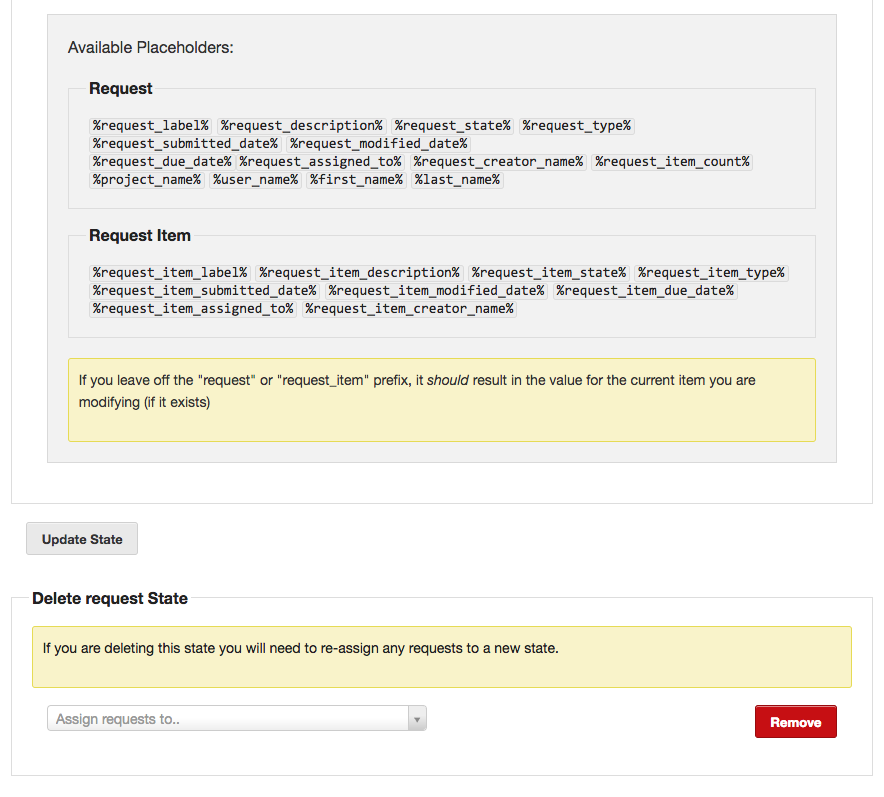
The main action for a state is to generate a notification that the request has changed state.
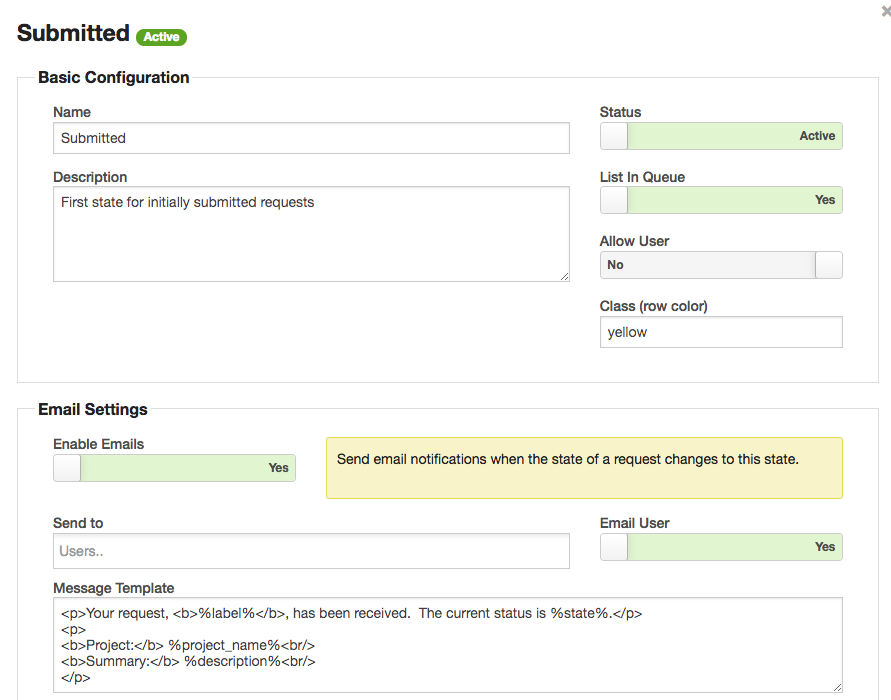
Name – The name of the state
Description – A human description for the meaning of this state
Status – Inactive states cannot be selected
List In Queue – Should requests of this state be listed in the request queue by default. (ex, completed = no)
Allow User – If no, users cannot select this state. Typically used for automatic, or default states.
Class – A CSS class to apply to the request queue row
Enable Emails – If yes, emails will be sent
Send to – A list of default users who should receive these emails
Email User – If yes, the user who submitted the request will be notified
Message Template – An email template to use when sending emails
Delete – If deleting a state that currently has requests associated with it, you must first select a new state to assign those requests to.
New Requests
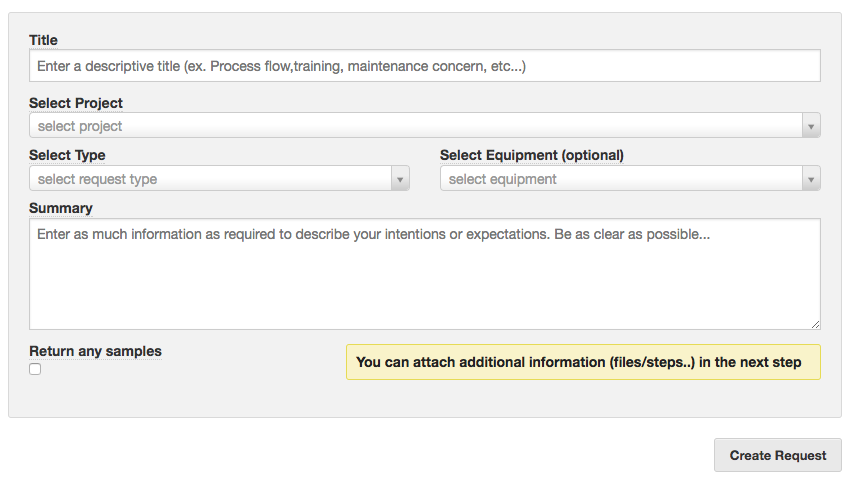
If enabled in the Facility Options, new requests can be created in the Requests section by any user.
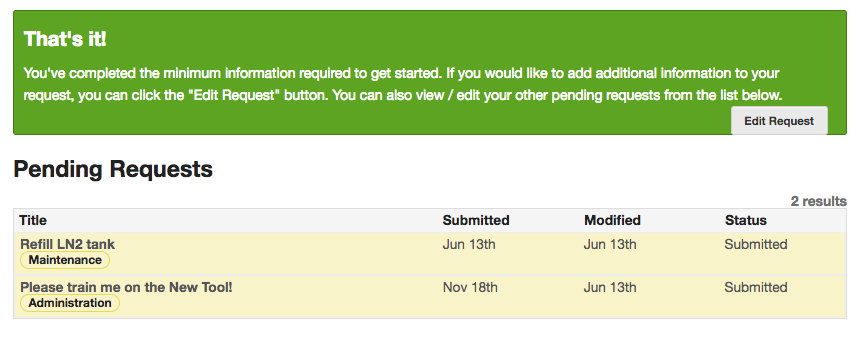
All information in the form is required except for the equipment. Once the request is created, it can be expanded on if more information is required.
HomePage
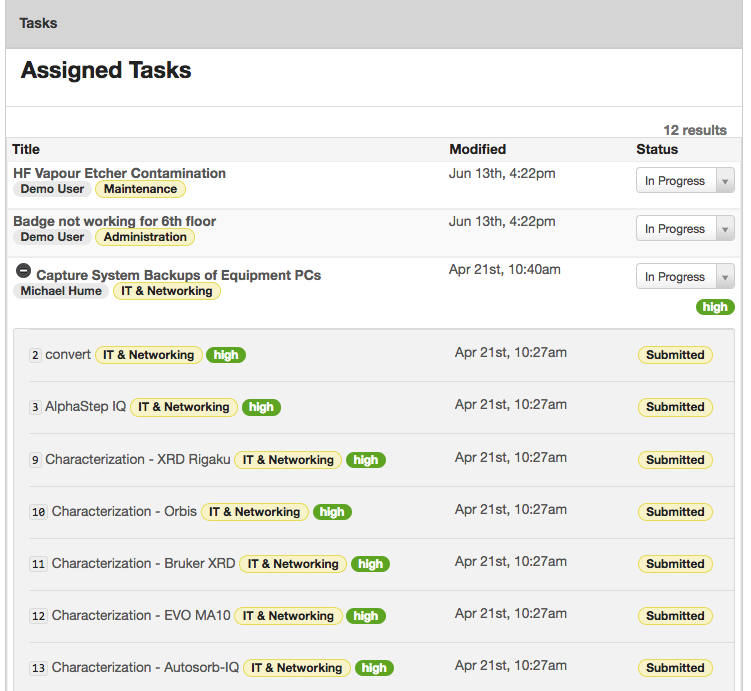
Both assigned requests and submitted requests are displayed on the homepage when a user logs into LMACS. This helps to bring action items to a users attention.
If a request contains multiple items, they will be listed in a collapsable drawer. Clicking the title will take the user to the complete request page. Requests are ordered by modification date.
Managing Requests
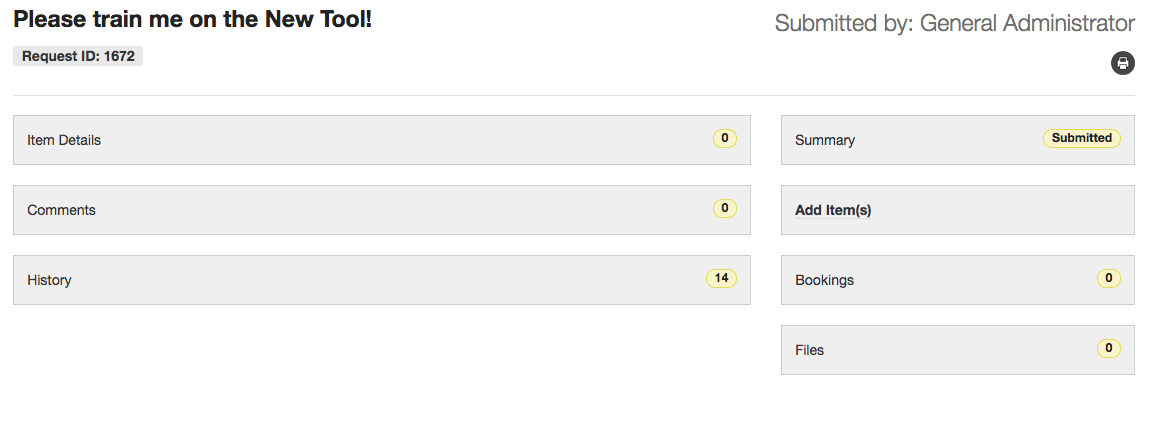
Each panel in the main request page can be collapsed or rearranged to suit user preferences.
Summary
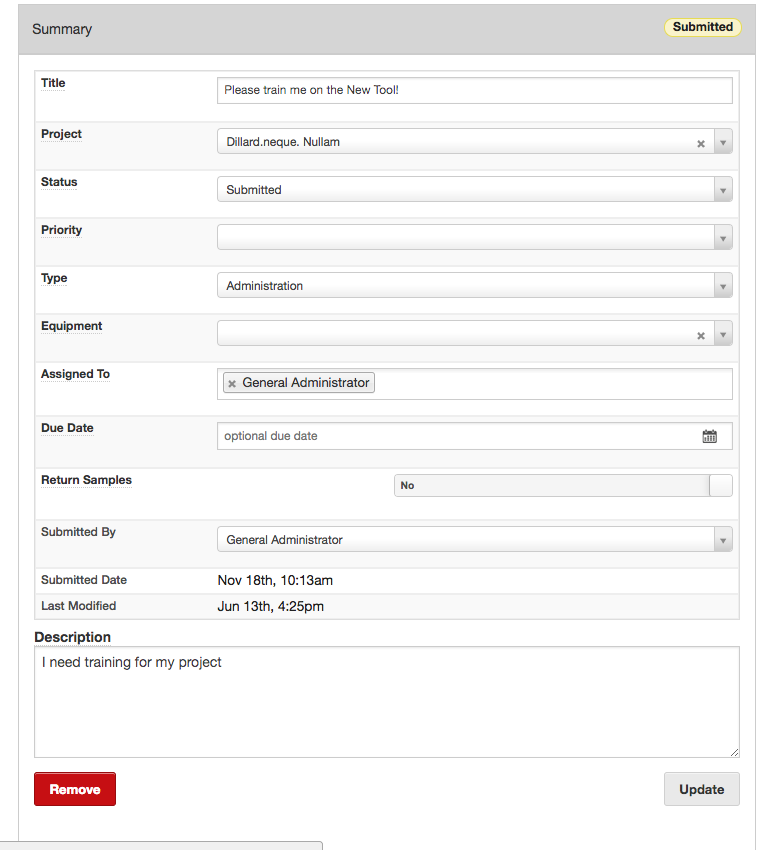
The summary panel provides information about the initial request. The fields that are editable will depend on the privileges available to the logged in user.
Title – The request title
Project – The project to apply any associated charges
Status – The current status of the request
Priority – An optional priority. If selected, new items added to the request will inherit the parent priority
Type – The request type
Equipment – Optional associated tool
Assigned To – List of assigned users
Due Date – Optional Due Date. Items that are past due will display the date in red
Return Samples – Designed for sample submissions. Optional parameter that denotes if any samples need to be returned
Submitted By – The user who created the request. This can be modified to facilitate submitting requests on other users behalf
Submitted / Last Modified – Timestamps
Comments
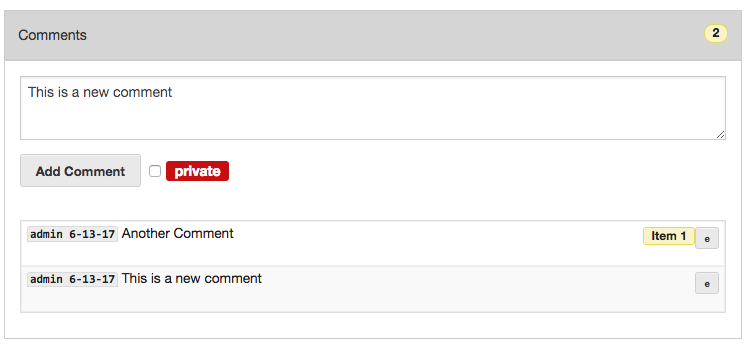
Displays a list of comments made. Comments made inside request item (sub tasks) will be tagged, but all are aggregated here. Comments are also sent to all assigned users. If Private is checked, comments will not be emailed and are only visible to staff members.
Bookings
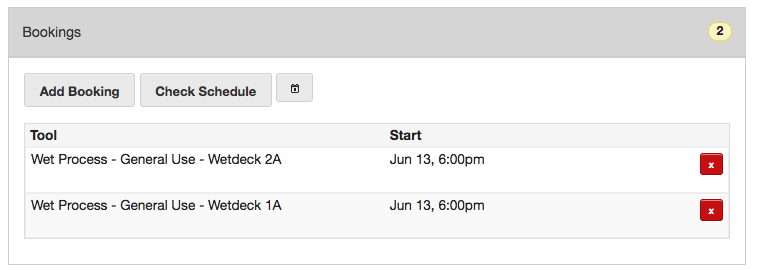
Displays any bookings made with respect to this request. Users can check schedules and book from this form.
Files
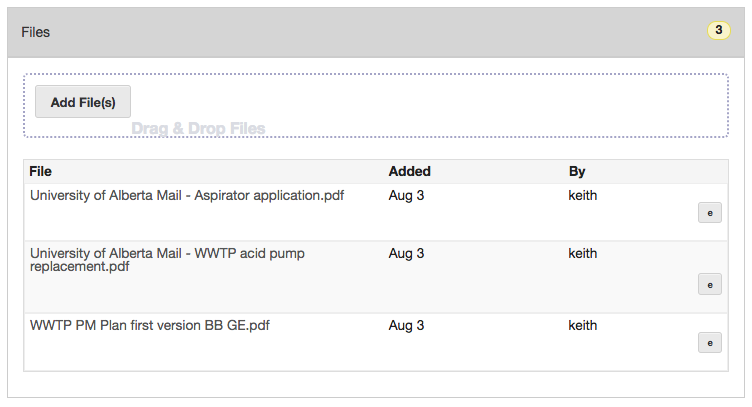
Displays any files that have been uploaded to the request. To upload new files, simply drag and drop the files into the upload form.
History
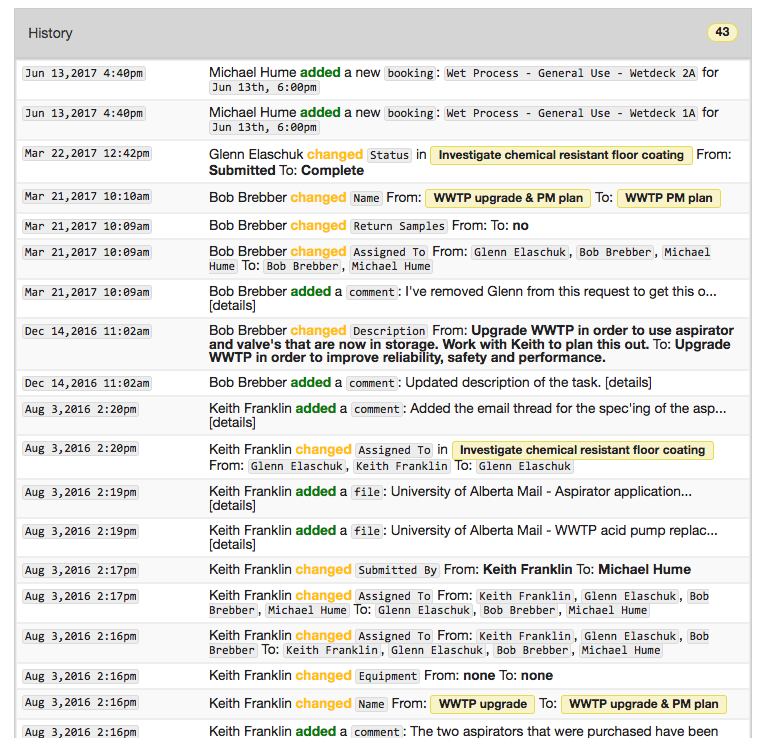
All actions made within a request are recorded and displayed in the History panel. These items cannot be modified.
Add Items
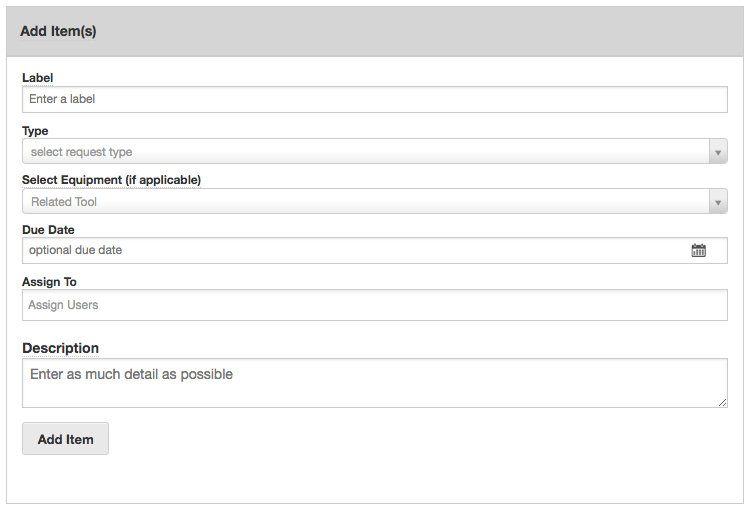
To create more complicated request, or track process steps, additional items can be added. Each item can have its’ own associated files, comments, and bookings. To add additional items to a request complete this form.
Items
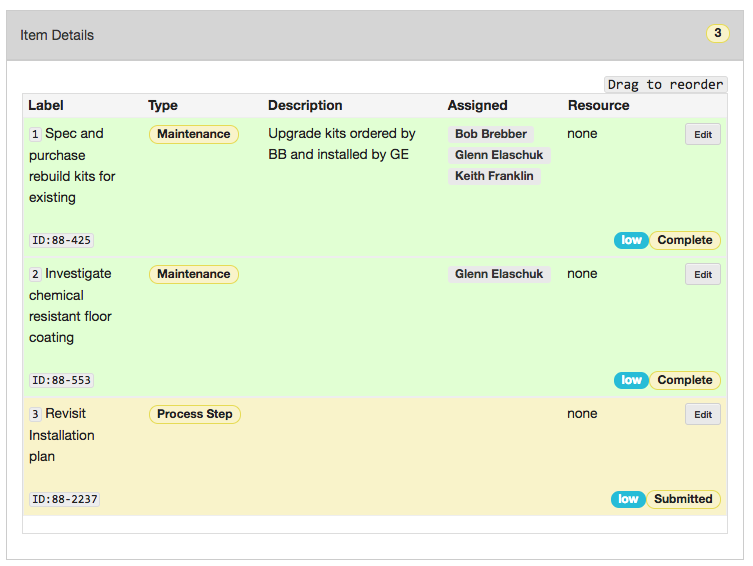
All items are listed in the Items panel. Items can be reordered by dragging them up or down. Clicking Edit will open the editor to modify any parameters of the item itself.

